Horizon
Getting Started with your Developer’s Kit
1. Unboxing
You should have the following components inside your Developer’s Kit box:
- 1 x Horizon GPS board
- 1 x Horizon ARTIC R2 board
- 1 x micro USB cable
- 1 x picoblade cable assembly (to connect the two boards together)
You’ll need to purchase an antenna (we’ve suggested a good one) and provide power to the board if you want to take your tag outdoors, but before you do that you can start programming your tag straight out of the box.
Important – Horizon boards now come pre-installed with the latest Linkit firmware and new users should follow the Linkit quick start guide to familiarise yourself with the new reed (magnet) switch commands and the Pylinkit command line tool. The Linkit user and programming guide is also available on Github (January 2025 or later).
The legacy Horizon ARTIC R2 Developer’s technical manual can still also be downloaded as a PDF so you’re ready to go, or follow the instructions below to use the legacy Horizon firmware.
2. Installing Tools
To talk to your tag you’ll need to install the Horizon Python tools.
We recommend using Ubuntu 20.04 LTS as the Linux operating system. The simplest setup is to use a Raspberry Pi 4 as your computer, as it’s easy to connect to the internet, install the tools, and you don’t need the Windows driver to get started.
If you’re using a Windows PC then you can use Oracle’s VirtualBox to setup a virtual machine and access your tag that way. Once you have installed VirtualBox on a PC be sure to setup USB so it passes through from the host. Here’s a useful guide showing you how.
If using Windows 10 then you should also install the Windows 10 Horizon Driver to ensure that Windows can detect the tag when connected over USB. WIndows 10 can’t detect the device without the driver installed, so you will need to do this before using VirtualBox as Windows 10 is the host and VirtualBox needs the Windows to first detect the device before it can also see it.
If you get stuck installing VirtualBox then also take a look at our more detailed VirtualBox setup guide for help.
Once you have setup VirtualBox / Linux and are ready to install the tools enter the following commands into Terminal. Tools and firmware are cloned from our Github repository so you should inherit the latest release.
If you run into any problems then post a message on our support forum and we can help you out.
Then select the version of tools you would like.
i.e cd 2_0_1 or cd 2_0_2.
Tools version 2.0.2 is the latest release. Install by navigating to /2_0_2 and running:
The tools are installed as tracker_config and can be called from the command line by running sudo tracker_config
To confirm that the tools installed successfully you can run the following command. It should return the version of the tools you have installed, i.e Version: 2.0.2
The tools are installed as tracker_config and can be called from the command line by running sudo tracker_config
To confirm that the tools installed successfully you can run the following command. It should return the version of the tools you have installed, i.e Version: 2.0.2
3. Connecting your tag
Now that you have installed the Horizon Python tools we can connect the tag to your host computer and start to talk to it.
Note – your tag has been set up ready to go from the factory using this default configuration, so you don’t need to change any configuration settings to test if. All you need to do is connect a battery, but it’s better to first connect over USB and check that everything is OK.
If you don’t have a battery you can still connect your tag using the provided micro USB cable. Try plugging it in and you should see it light up and two LEDs will be active (power and activity).

We can now call the tracker_config tool and provide it with arguments to talk to your tag. Let’s send a status request first and see what we get back. Enter the following command:

For a full list of commands that you can use type the following;
4. Configuring your tag
Issue the following command to configure the Horizon board to use the ARTIC R2 firmware. Make sure you are in the tools directory, as we are providing the path /sample_config in the command, so it look for the file artic.bin inside that directory.
Your tag has already been configured to transmit using the Argos / Kineis satellite module out of the box, so you can connect it with the included cable assembly, connect a battery, and it will start to transmit when you disconnect USB. However, we should download the tag’s configuration file and made some edits as you should update the “prepass” data that tells the tag when a satellite is passing so it can transmit within the pass window. See Preparing for Deployment for more information on how to update the prepass bulletin data in the tag’s configuration file.
The tag uses a JSON configuration file so it’s nice and easy to make changes and apply them.
Let’s start by downloading the default configuration installed on your tag from the factory.
To do this run the following command;
Note – you call the file downloaded anything you like, but in this instance we have just called it default.json
You should now have the configuration file default.json on your computer.
Open that file up in a text viewer and you’ll be able to see what’s inside. You can also open it from terminal by typing;
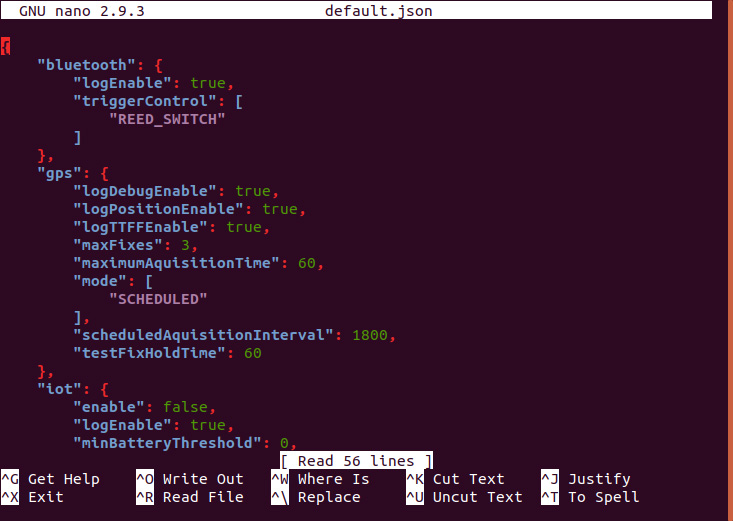
We can now see the configuration of the tag. For information on what each configuration value does (and means) a complete list is available on Arribada’s Horizon github repository.
Your tag straight out of the box has been configured ready to go with the following configuration:
- Wake every 5 minutes to aquire GPS positions and spend 60 seconds on trying to aquire before going back to sleep.
- Log the first 10 GPS fixes everytime it wakes up.
- Transmit the GPS location and battery voltage via Argos / Kineis.
- Aquire the time from the GPS fix.
- Log everything locally to the tag.
*****
Did you purchase your tag before January 2022?
If you purchased your tag before January 2022, then you’ll be running firmware version 11.1a4 or below. This means you’ll notice that “iot“, “enable” is set to “false“. This is the only value you need to change to start using the Argos / Kineis functionality. It is disabled by default so we need to change this value and upload the new configuration file to the tag.
To do this manually change “false” to “true” and save the file (in nano you would press CTRL+ O and then press enter to save the file.
Lastly, include your Argos ID printed on the green card included with your kit. The configuration file to edit is;
“deviceAddress”: “00:00:00:00”
*****
Did you purchase your tag after January 2022?
If you purchased your tag after January 2022 then you will be running firmware version 11.1a6. In this release the Argos Artic ID is hardcoded at factory and saved in flash memory that is retained, so you no longer have to set the deviceAddress. It will be automatically populated and used by the tag. IoT has also been set to “enable” by default, so you really only need to update the prepass data to get started.
*****
Remember to save any changes to your configuration file.
Once saved, let’s upload it to the tag by running the following command;
That’s it.
Your tag is now ready to go. You’ll now just need to provide power and attach an antenna to the satellite board, also not forgetting to register an account with CLS so you can see your data in the ArgosWeb dashboard.
It’s important to check the polarity of the battery you are connecting. Confirm the correct polarity by following your + battery cable to the end of the JST connector and confirming that it marries with the + on the board’s JST socket. It’s quite easy to buy a battery off the shelf and connect it, but only later realise that the polarity is wrong.
With your battery attached (a Lithium-ion 18650 or Lithium polymer 3.7v battery is fine), unplug your USB cable. The green status LED should flash for a few seconds. It will then extinguish. Your tag is now in operational mode and will wake to get a GPS fix or transmit to Argos based on your configuration settings. Connect it again when you want to pull logs from it or update your config file.
Additional advice, including how to download and decode data received in the ArgosWeb dashboard to view GPS locations / battery status etc, is available in our follow on complete deployment guide.
We’re all in this together