Horizon
Flashing your Horizon tag
Preparing to Flash
Important – Horizon boards now come pre-installed with the latest Linkit firmware and new users should follow the Linkit user and programming guide available on Github (January 2025 or later).
Flashing your legacy Horizon device
We use the nrfutil tool to flash Horizon tags. The nrfutil tool is a Python package and command-line utility that supports Device Firmware Updates (DFU) and cryptographic functionality.
At present, version 6.1.0 of nrfutil will happily install on Ubuntu 20.04 with Python 3, however the pip3 install doesn’t currently install nrfutil correctly. The work around is to use an older specific version of nrfutil (5.2.0) until this has been fixed in pip.
Therefore, we’ve provided instructions below to help you flash your Horizon tags dependent on your operating system. If you are using Ubuntu or VirtualBox, continue below.
If you are using Raspbian (Raspberry Pi OS) follow these instructions to install nrfutil.

2. Flashing using VirtualBox / Ubuntu 20.04
If you are using VirtualBox to manage your tag and have installed Ubuntu 20.04, or are using our default VirtualBox image, then you first need to install Python 2 and pip. Ubuntu ships with Python 3 by default, but nrfutil 5.2.0 requires Python 2.

Once installed, you can then install nrfutil 5.2.0 using:
sudo pip2 install nrfutil==5.2.0
Now nrfutil is installed, download the latest version of Horizon firmware from our Github repository, or use our direct link to download the latest firmware (v11.1) released March 2021.
Release v11.1
Tools 2.0.2
March 2021
Changelog 11.1
- Fixed – TCXO warmup time now sets correctly
- Fixed – Disabling BLE by reed switch was incorrectly logged as being caused be a SCHEDULE_TIMER
- Fixed – Artic schedule now aligns correctly with GPS schedule, fixing an issue where it could trigger too frequently
- Fixed – Stack corruption occurs when bluetooth is enabled
- Fixed – Artic firmware CRC check can sometimes fail
- Fixed – Green LED continues to blink from entry to operational state until first schedule triggers
- Fixed – Timers can fire immediately if a timer callback takes longer than a second
https://github.com/arribada/horizon/blob/master/firmware/v4_11_1a/v11.1a_2.0.2.zip
Changelog 11.0a4
- Implement new BCH encoding
- Support Argos protocol v2
- Allow configuration of Artic TXCO warmup time for faster transmissions (3 seconds is the new default)
- Add retransmissions
- Allow maximum elevation to be 0
- Fixed the “satellite module detected” always returning false in a status request
- Fixed a bug where Argos ZTE was wrong (thanks to PaulZC)
- Added a full table of available config parameters to the Github Wiki
3. Installing the Firmware & Updated Tools
Extract the ZIP file to a folder.
Inside you will find two more ZIP files, the firmware and tools version 2.0.2
horizon_app_v11.1a_debug_dfu_8f491543.zip
arribada_tools-2.0.2.zip
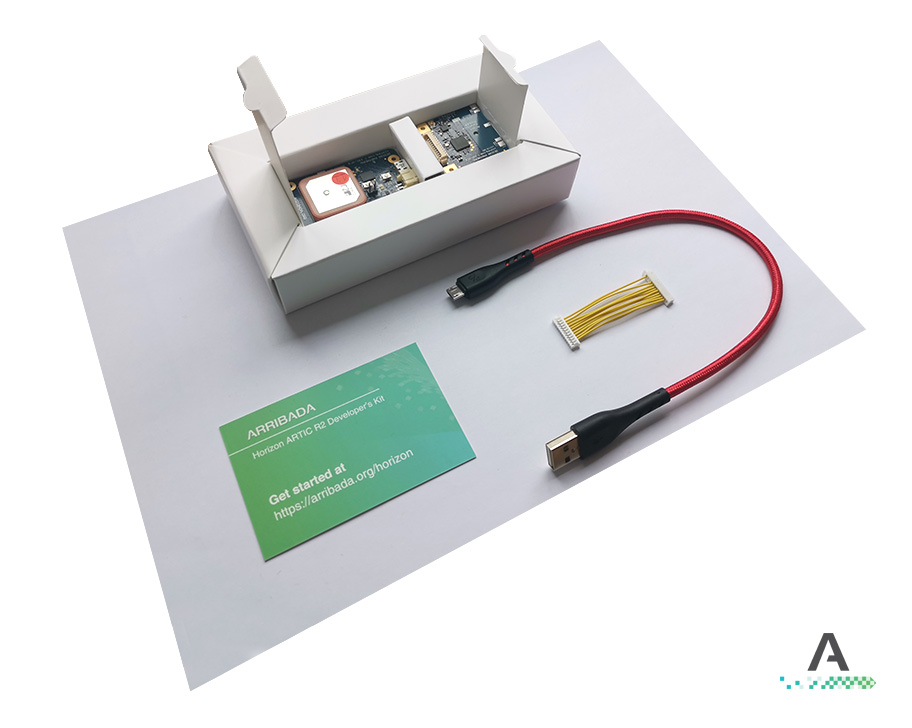
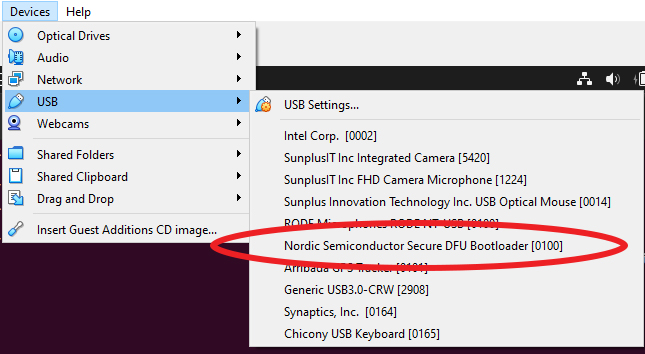
Connect your tag using the provided micro USB cable. Note – once connected, in VirtualBox, click USB from the top menu and make sure Arribada Tracker is selected. You don’t need to do this if using Ubuntu outside VirtualBox, but in VirtualBox you do need to select the connected USB device for it to be enumerated (connected to your host).
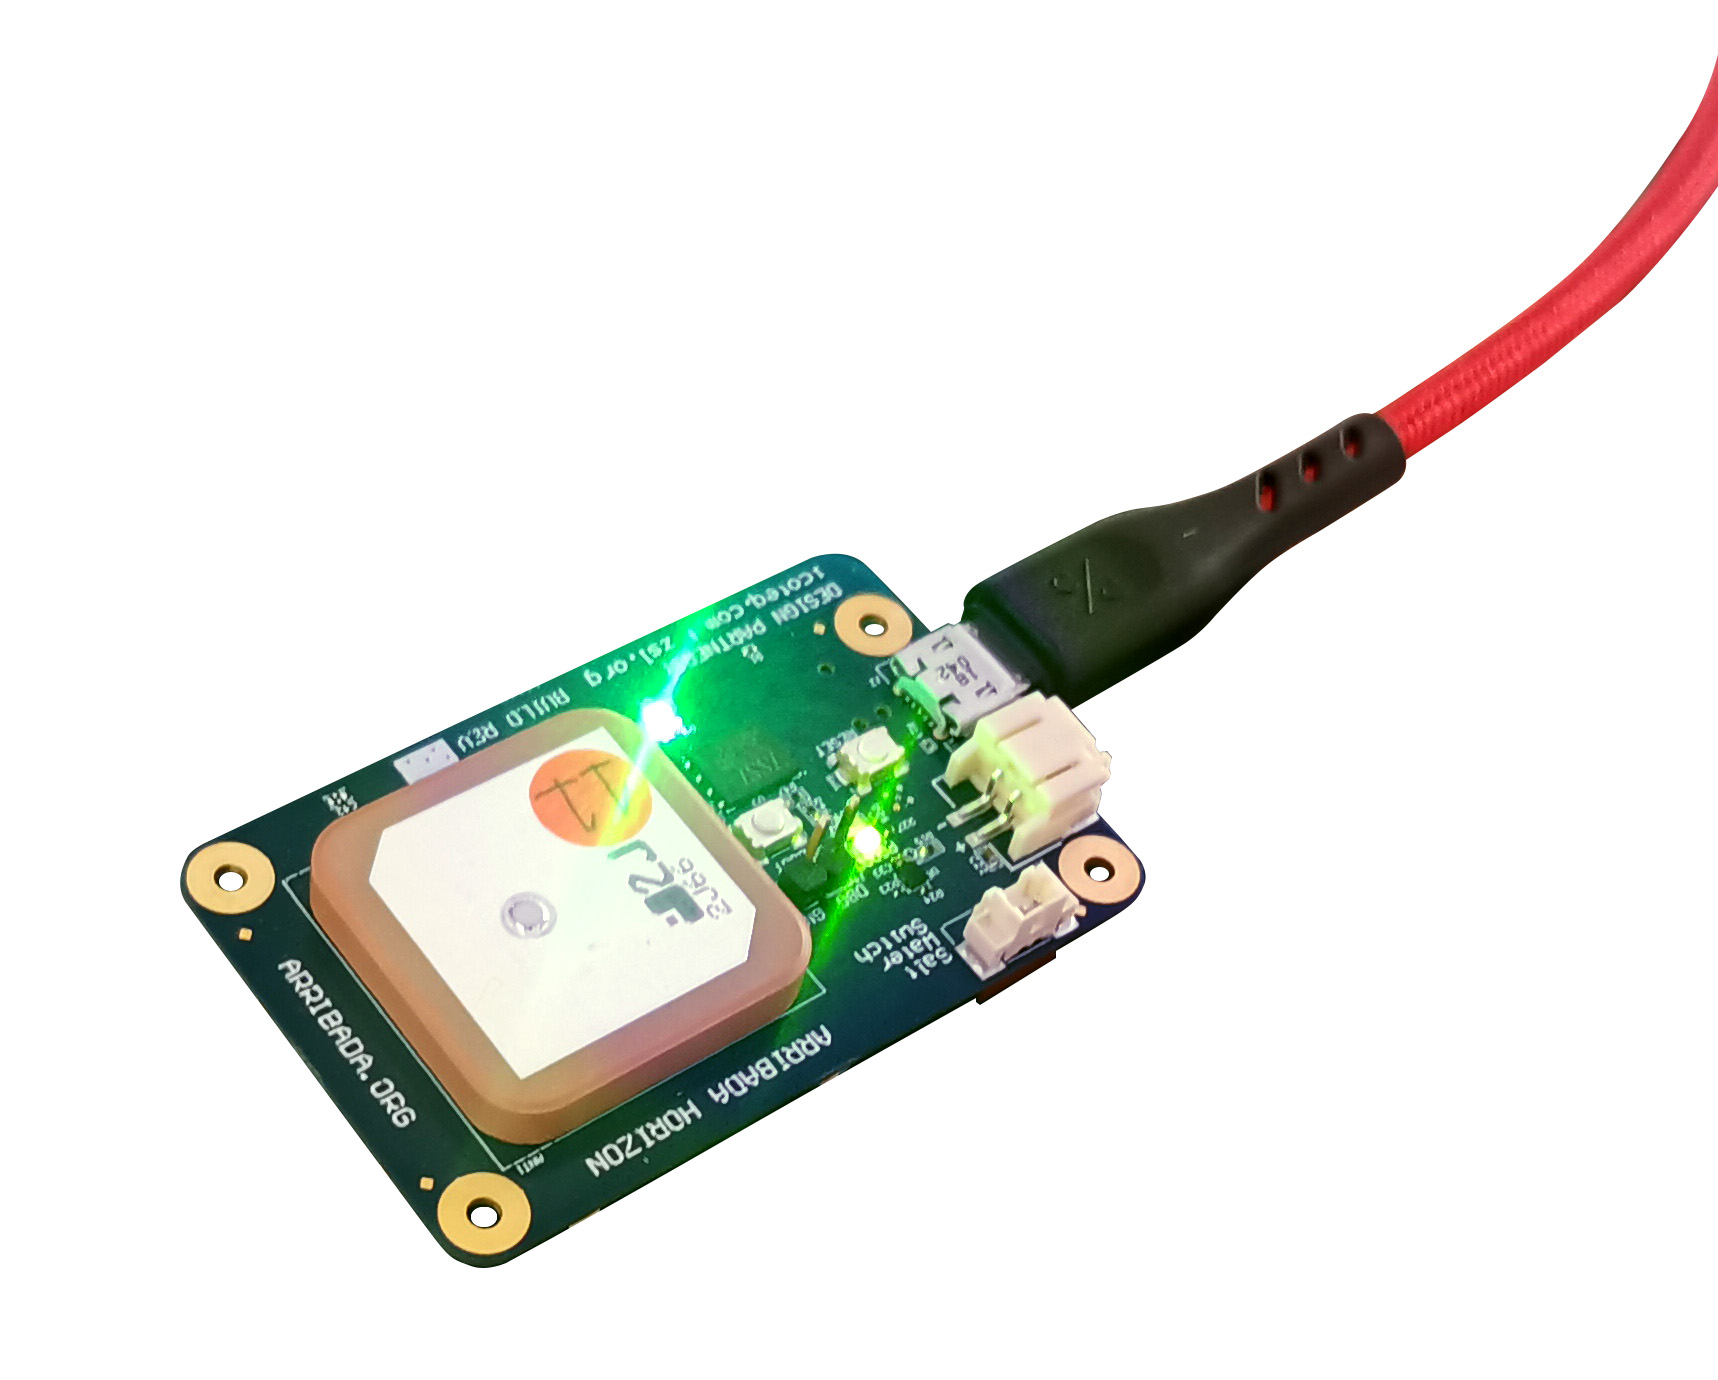
You should see it light up and two LEDs will be active (power and activity). If you are using VirtualBox on a Windows PC and you don’t see the green activity light then you may need to install the Horizon Windows driver. Recent Windows updates no longer support using a generic Windows driver. If you need to install the Windows 10 driver you can follow our guide here.

Next, copy the firmware ZIP file to your Horizon tools directory (horizon_app_v11.1a_debug_dfu_8f491543.zip).
We now need to switch the Horizon tag into DFU mode so it will accept the firmware update. Before doing so, write out the following command, but don’t press enter just yet. We are going to write out and prepare to run the command, place the device into DFU mode, and then run it.
Write out the following command into terminal
sudo nrfutil dfu usb-serial -pkg horizon_app_v11.1a_debug_dfu_8f491543.zip -p /dev/ttyACM0
Note – the “0” in ACM0 is a zero, not the letter 0.
To place the Horizon tag in DFU mode, press and hold down the BOOT button. Then, whilst still holding down the BOOT button press the RESET button and observe the LED change. Watch the video below for a demonstration.
The activity LED will cycle between blue, green and red indicating that you have entered DFU mode.
You have 20 seconds to complete the flash command before the device resets back to operational (we will increase this in later releases). You will also notice in the video that it resets after 20 seconds once the DFU mode command has been issued.
As soon as you enter DFU mode, immediately press enter on your computer’s terminal to run the nrfutil command (if using Ubuntu on a laptop / desktop). If you are using VirtualBox, you will need to click USB in the top menu and select Nordic Semiconductor Secure DFU Bootloader so the device is attached before running the nrfutil command. You need to be quick as DFU mode only runs for 20 seconds before it resets back to normal
A status bar will be displayed to show progress. Once flashed, press the reset button to restart the device using the new firmware.
Hold the BOOT button down, and whilst continuing to hold it down, press the RESET button as seen in the video below to enter DFU mode:
If using VirtualBox, click USB > Nordic Semiconductor Secure DFU Bootloader to re-select the device before running the nrfutil command.

A progress bar will be displayed indicating that the device has been flashed successfully.

4. Updating the Horizon Python Tools
New Horizon firmware requires an update to the Python tools to access new features. Inside the firmware ZIP that you downloaded was a second ZIP containing the Horizon tools.
arribada_tools-2.0.2.zip
Extract the tools ZIP file and run the usual setup.py install file.
sudo python3 setup.py install
Once installed, check that it was successful by running:.
You should see the tools version returned. Check that it matches with the version you just installed.
Note – new firmware updates for Horizon also come with a default configuration file as an example. This will contain new parameters that are available. Take a look inside to see what’s new, or use the default file as a template to create your own configuration file. Remember to update the Argos ID with your own ID too.
That’s it.
Your tag is now ready to go.

We’re all in this together